Enabling the Load Module Plug-in
After logging into the Administration area (the back end) of your Joomla site, check to see if the plug-in is enabled by going to the Plug-in Manager. Go to Extensions > Plug-in Manager.
Make sure that the “Content-Load Module” plug-in is enabled. Check the box next to the module’s name and click on the “Enable” button in the toolbar or simply click on the enable icon to enable/disable the plug-in.
If you click on the plug-in name it will open it up and there are instructions on how to configure it to suit your needs. The next step is to set up a module.
Back to Top
Setting up the Module
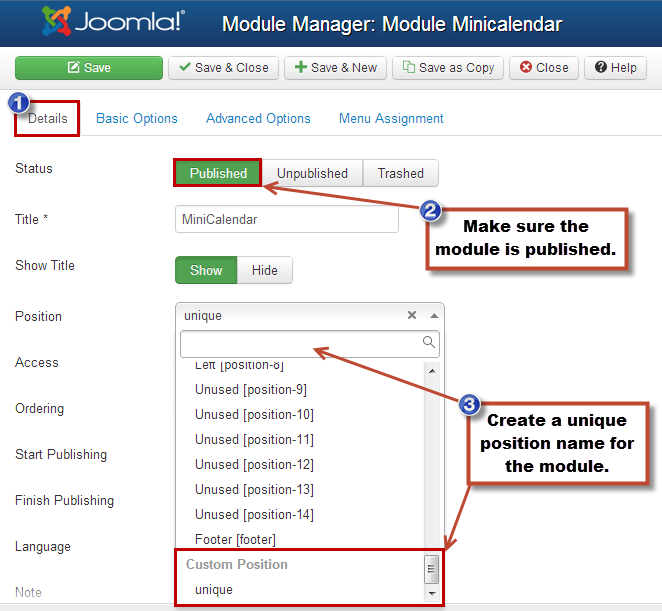
After enabling the plug-in, open the module that you’d like to feature inside the article. As you set up the module, make sure it’s published, but don’t select a position for the module from any of the templates that you’ve installed. Instead, use a unique word for the position of the module. For the purpose of this article, we’re embedding a calendar module into an article, and we typed in the word “unique” for the module position instead of selecting a position from our template. Be sure to save your work when you’re done.
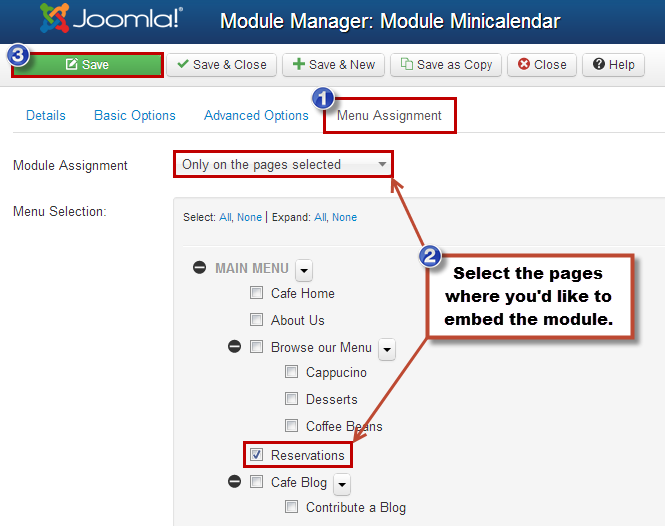
Next, go to the “Menu Assignment” tab. Display that module only the menu item(s) where you want it to appear. For the purpose of this article, we are putting the calendar module only on the “Reservations” menu item. Be sure to save your work when you’re done.
After saving the module with the unique position and making sure that the menu assignment is correct, go to the Article Manager.
Back to Top
Loading a Module into an Article
After creating the module, open the article where you’d like to embed the module. Place your cursor where you’d like the module to be, and type . For the purpose of this article, we typed in “unique” in the tag because we titled our module position “unique”. Be sure to save your work.
Return to the front end of your site, refresh the page and you will see the module embedded into the article.


